To create a new monitoring plan configuration by adding a stack or a pipe, click the MONITORING PLAN DATA module in the Menu Panel in the lower left corner of the screen. Click the ADD/EDIT MONITORING PLAN DATA link in the Module Action Panel. Highlight the facility to which you want to add a new stack or pipe, or select a facility in the FACILITY ID (ORISPL) dropdown box at the top of the screen and click the FILTER button. To clear the filter, click the CLEAR FILTER button. When you have selected a facility, click the CONTINUE button in the lower right corner of the Working Panel.
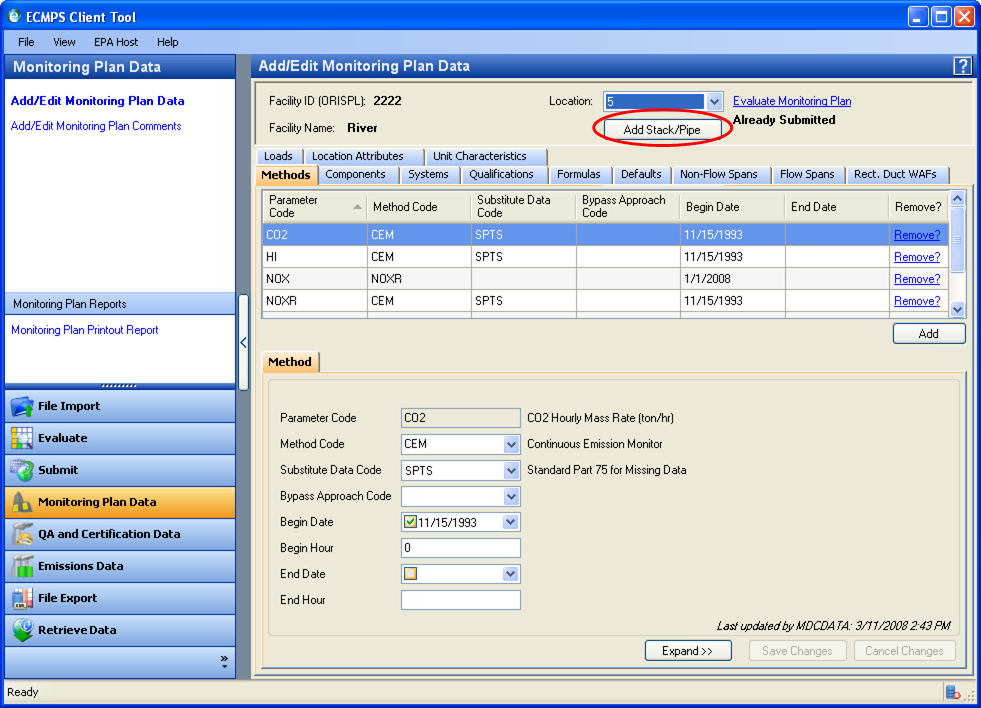
The ADD/EDIT MONITORING PLAN DATA screen that appears will be populated with data from the facility you selected. Click the ADD STACK/PIPE button under the LOCATION dropdown box (see image below).

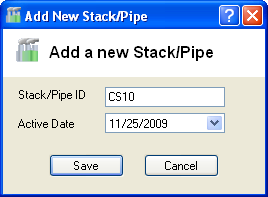
The ADD NEW STACK/PIPE dialog box will appear. You must create a new STACK OR PIPE ID and indicate the ACTIVE DATE. New stacks and pipes must begin with the following abbreviations:
Common Stack = CS
Multiple Stack = MS
Common Pipe = CP
Multiple Pipe = MP
To these abbreviations, you can add 1 to 4 letters and/or numbers. In this example, a new common Stack ID of "CS10." is entered. Click the SAVE button.

An informational message will notify you that a new Stack/Pipe record has been created, and will prompt you to assign any associated Units. Click the OK button.

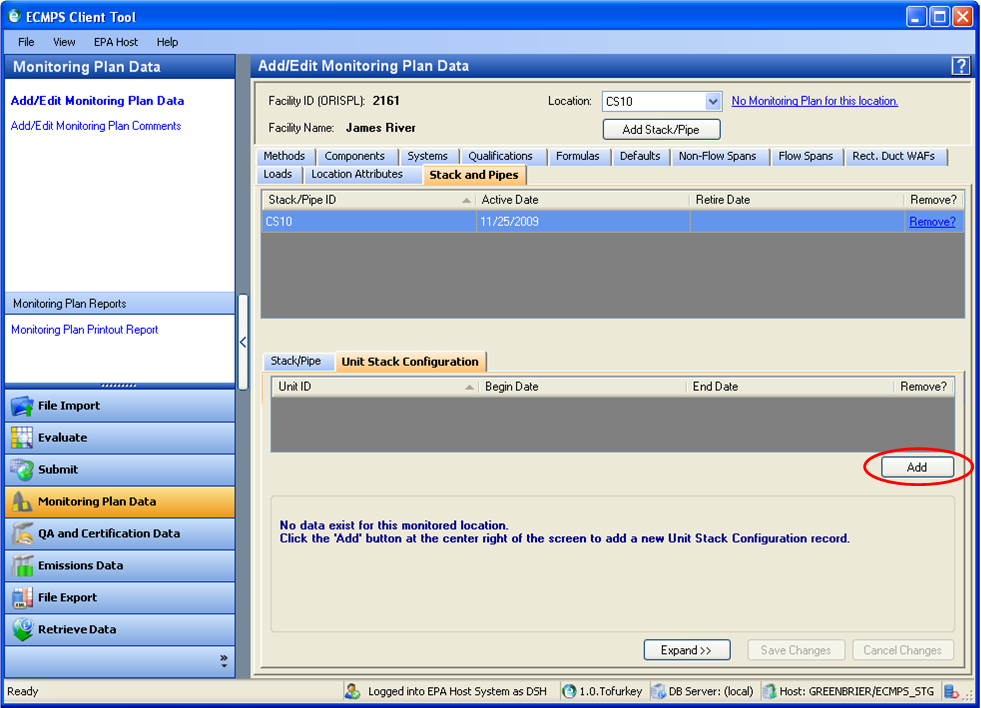
The top grid on the STACK AND PIPES tab will display your newly added Stack Pipe ID and Active Date.
In the upper right corner of the screen, the status link to the right of the Location dropdown box may have previously read “No Errors” or “Evaluate Monitoring Plan.” It will change to “No Monitoring Plan for this location.” This status will remain until you complete the steps below to assign the stack/pipe to an existing unit with a monitoring plan, thereby creating a Unit Stack Configuration record.
The UNIT STACK CONFIGURATION tab will be displayed in the lower half of the screen. Click the ADD button in the lower right corner of the lower grid to add your new Unit Stack Configuration record.

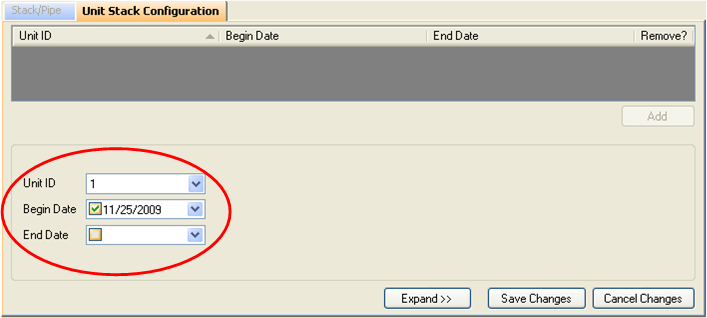
Use the Unit ID dropdown list to select the unit with which to associate the Stack/Pipe. Enter the Begin Date for this association. Click the SAVE CHANGES button in the lower right corner.

In the lower left corner of the screen, you will see the message “Successfully inserted new Unit Stack Configuration record.” In the upper right, the status link to the right of the Location dropdown box now reads “Evaluate Monitoring Plan.”
For a common stack or pipe, click the ADD button again. Repeat this procedure until you have associated the stack/pipe with all the appropriate units. The remaining details of the monitoring plan can be completed by selecting the tabs across the top grid (e.g. Methods, Components, System, etc.). For more information on navigating through these data fields, see the help topic Edit an Existing Monitoring Plan.
Tutorials: To watch various tutorials that briefly explain some of the main aspects of the ECMPS Client Tool, visit the ECMPS Support website.
Feedback: Did this help topic answer your question? Can it be improved? Click here to let us know.