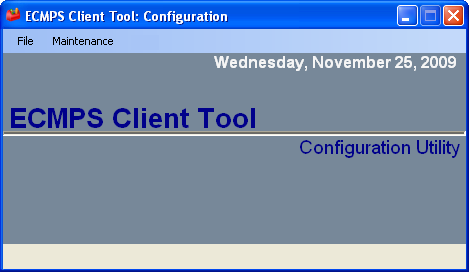
The ECMPS Client Tool Configuration Utility can help you maintain your ECMPS Client Tool. It allows you to maintain your database and control which users have access to your Client Tool.
To open the Client Tool Configuration Utility:
1) Close the Client Tool.
2) Navigate to Start | All Programs | ECMPS | ECMPS Client | ECMPS Configuration Utility

To access this tool, open the ECMPS Configuration Utility and choose File, then “Configure Client Tool”. The top panel of the ECMPS Client Tool Settings window allows you to configure shared database connections. Your database administrator should provide the data source and password, and determine if you are using Windows Integrated Security.
The lower panel allows you to enter unique proxy server credentials. Most users do not need to provide this information. You can determine if you need to enter unique proxy server credentials by using the ECMPS Host Connection Test utility, which is also located under the Start menu.

The Client Tool Configuration Utility allows you to maintain which users have access to your local Client Tool. For more information on System Managers and Data Entry Users, Adding and Editing Users, Deleting a User, and Requiring User Passwords, click here.
You can also edit local user rights through the "Local User Rights" item under the File menu. This functionality is used to limit the number of facilities that are visible to a user in the Client Tool. Local user rights are not applied to the Submit or Retrieve screens -- all facilities that are associated with a Submit or Retrieve agent will be visible on the Submit and Retrieve screens.
Note that System Managers can assign users different levels of access using the No Access, Full Access, and Implicit Access checkboxes. Local User Rights do not go into effect until the Client Tool is restarted.
The first item under the Maintenance menu is "Database Backup." You may have used the backup functionality when performing a software update; you are prompted to backup your databases before the Client Tool downloads software updates. This functionality can also be used to create a copy of your database to send to technical support. For more information and directions on how to back up the database, click here.
This functionality should be used with caution because restoring a database will completely erase any data that exist in the Client Tool at the time of the restore. Most often, you will restore a database from a backup to correct a technical issue. For more information and directions on how to restore the database, click here.
The third item under the Maintenance menu is "Purge Data." As noted at the top of the screen, purging data from your local Client Tool database does not mean that any data are deleted from the EPA Host System. If you need to remove data from the EPA Host database, you must contact ECMPS Technical Support and obtain EPA permission. For more information on purging data, click here.
Synchronization occurs every time you log into the EPA Host System with the Client Tool. In order to help resolve technical problems, you can also force the Client Tool to synchronize with the EPA Host System using the Synchronization Management tool. However, this functionality can only be used in conjunction with a technical support request as it requires a password, which is changed daily.
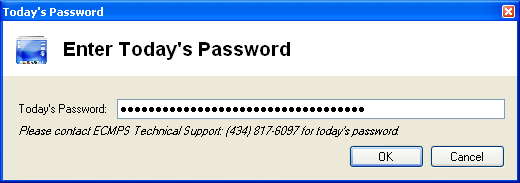
To force synchronization, select synchronization management under the Maintenance menu of the Client Tool Configuration Utility. You will be prompted to enter Today’s Password (see image below). Enter the password obtained from Technical Support, and click the OK button.

The Synchronization Management tool allows you to choose to synchronize a specific facility and unit by highlighting it in the Facility list (see image below). You can also choose which type of data to synchronize by selecting the check boxes in the Data Type list. After you have made your selections, click the Update! button and synchronization will occur.

The ECMPS Client Tool Configuration Utility allows you to run a script against your local database. Technical Support might ask you to do this if there is a bug in the software that can be fixed with a script. You will also need to enter a daily password, which Technical Support will provide.
To run a script, save the file that Technical Support sends you to your computer. Open the ECMPS Client Tool Configuration Utility and choose Maintenance, then select run script. You will be prompted to enter Today’s Password. Enter the password obtained from Technical Support, and click the OK button.
The Run ECMPS Script window will appear. Select the script by clicking the Select Script File button and browsing to the file obtained from Technical Support. Then click the run script button.
Tutorials: To watch various tutorials that briefly explain some of the main aspects of the ECMPS Client Tool, visit the ECMPS Support website.
Feedback: Did this help topic answer your question? Can it be improved? Click here to let us know.